APPLICATION INSTRUCTIONS for AKWA Stain
Preparation:
Pre-sand with 180 grit paper prior to applying stain.
Apply to raw timber only.
Hand staining:
Stir well before use. Apply with a clean soft lint-free white cloth. Coloured cloths should be avoided as dyes within these cloths may cause discolouration. Apply the stain to wet the whole surface being stained, leave for a few minutes and then wipe off with a second cloth working along the grain. Failure to wet the whole surface may result in uneven stain penetration giving patchy drying and unevenness of colour. The skill employed during wiping off is important, as this will greatly enhance the evenness of the colour, grain definition and the highlighting of the timber’s natural figuring. If sufficient depth of colour cannot be obtained with range of stains, a spray colour should be incorporated into the finishing system.
Spray application:
Can be applied using a spray gun and wiped off with a clean lint-free cloth.
Dipping:
Can be applied by dip application but it is advisable to “rag off” afterwards to achieve an even degree of staining and grain definition enhancement.
Overcoating:
Allow to dry for 4 hours (at 25oC) before overcoating with lacquer. Note: a solvent based product must be used as a first coat sealer. Water based sealers can then be subsequently applied.
Thinning:
Thinning is generally not required and is discouraged. However if thinning is required, use clean water and thin by no more than 5%.
Coverage:
14-18 square metres per 1 litre per coat. This is a rough guide only given that the coverage will be dependent on the type of application.
Clean up:
Clean up in water.
IMPORTANT:
Test colour on a small section of timber first.
No claim will be recognised once stain
has been applied.

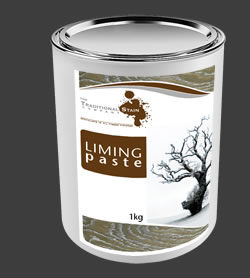
APPLICATION INSTRUCTIONS for LIMING PASTE
When producing limed oak effects, care should be taken to select deep grained timbers.
If the grain is not deep, the timber should firstly be wire brushed to deepen the grain. Ensure that this operation is carried out with the grain of the timber. The finishing process can then start.
1. Stain timber to required colour. Allow to dry.
2. Apply thin sealing coat of lacquer. Allow to dry.
Lightly denib with 320 grade silicone carbide paper.
DO NOT SAND THROUGH SEALING COAT.
3. Apply Liming Paste by hand. Using a soft cloth, ensure that the grain is filled with Liming Paste and that all surplus paste is thoroughly removed. Leave a minimum of 4 hours to dry.
SAND LIMED SURFACE WITH 240 GRADE GARNET PAPER WITH THE GRAIN TO PROMOTE GOOD ADHESION WITH SUBSEQUENT FINISHING COATS OF LACQUER.
4. Apply a thin coat of lacquer and allow to dry.
5. Lightly denib with 320 grade silicone carbide paper and apply a normal full coat of lacquer.
DO NOT APPLY LIMING PASTE TO UNSEALED TIMBER OR BETWEEN HEAVY COATS OF LACQUER AS THIS WILL RESULT IN POOR ADHESION.
Many decorative effects can be obtained by experimenting with the base stain colours.
The colour of the Liming Paste can easily be altered to the required colour by mixing in dry pigment colours. Care should be taken to ensure that the Liming Paste container is resealed after use. Failure to do this can result in solvent loss due to evaporation. If the paste should thicken and application become difficult, a small amount of White Spirit should be added to the Liming Paste. Always endeavour to use a lacquer formulated for coat on coat application and use the same lacquer throughout.
IMPORTANT:
Test colour on a small section of timber first.
No claim will be recognised once stain
has been applied.
